1.8 KiB
1.8 KiB
VirtualBox setup
Openstack VMs
- 2 Openstack VMs with identical configuration.
- 8 cores, 8GB RAM, 40GB disk, named node1 + node2 during installation.
- 1 Deployment VM named deploy.
- Ubuntu server 22.04 installed with defaults and only SSH server enabled.
- Ensure all network adapters are set to allow promiscuous mode, this should allow many MACs to originate from a single interface.
Openstack VM networks
Note: The Deployment VM only needs to be on the api and bridged networks.
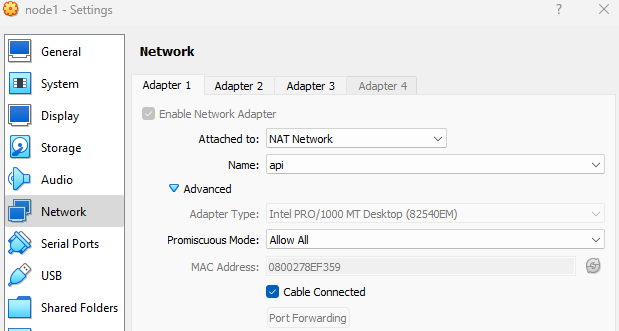
Create the api network, this will allow outbound traffic for the Openstack nodes (package updates etc). As the cluster configuration is minimal port forward rules are in place to access the dashboard on the api network.

Adapter1 on SNAT network api.
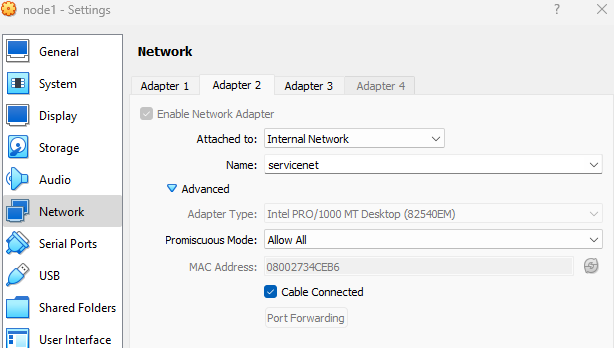
Adapter2 on internal network with no NAT, this will carry some VLANs, this network does not need creating, just type the name of the network in the dropdown and ensure the same name is used on all nodes.
Adapter3 bridged to the host network interface, this will be used for the Openstack provider network.

Disable Hyper-V extensions that block VirtualBox
bcdedit /enum | findstr -i hypervisorlaunchtype
bcdedit /set hypervisorlaunchtype off
#bcdedit /set hypervisorlaunchtype auto # to reenable
reboot
Enable nested virtualization for each Openstack VM
cd C:\Program Files\Oracle\VirtualBox
.\VBoxManage.exe modifyvm "node1" --nested-hw-virt on
Check nodes can run nested virtualization.
sudo apt-get install cpu-checker
sudo kvm-ok